
Did you know that the density of your stitches can make a big difference in how your embroidery looks on different fabrics? Yes we never wonder about it until we actually come across it. We have so much to explore in the world of embroidery densities, how they can enhance your projects on various types of fabrics. Embroidery density is the spacing between rows of stitches in a fill or between individual stitches in a satin column. An area with more stitches is denser when the rows are closer together.
There are two methods of understanding the concept of density when it comes to embroidery.
Measurement of Density
Like I said, density in embroidery is measured in two primary ways.
Most embroidery software uses one of the method to measures the actual distance between alternating rows of stitches.
- The other method counts the number of stitches per inch (SPI).
Understanding Density
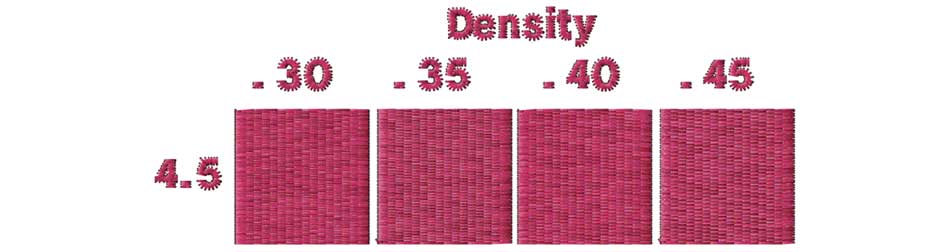
The smaller the density number, the more dense the stitching.
- A typical density value ranges from .4 to .45.
- A density of .8 is half as dense as .4, resulting in more open stitching.
- A density of .2 is twice as dense as .4 and is generally not recommended.
Where and how density is used? Does it really affect your embroidery?
Density is primarily used in satin and fill stitches, as well as in underlay stitches. Underlay stitches typically have densities ranging from 2 to 4 mm. Running stitches, on the other hand, do not have density.
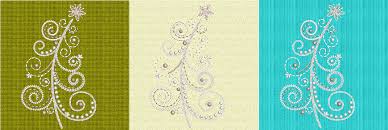
The density of stitches in embroidery can have various effects on the final result. Varying density is often used to add visual interest and serve specific purposes in a design. Lighter fills are great for creating backgrounds like skies or water, allowing the main subject to stand out and adding depth and perspective. They also help the design blend more smoothly into the fabric, avoiding a patchy appearance.
Lower densities result in less coverage, which can be beneficial for creating shadows, shading, texture layers, or tone-on-tone embroidery. Designs with lower density stitch faster and put less stress on the fabric, resulting in a softer and more flexible embroidery. On the other hand, high densities, especially with short stitches, can make the design feel stiff and thick.
Excessive density can lead to issues such as thread breaks, broken needles, fabric damage, distortion of the design, and longer sewing times. Novice digitizers often make the mistake of using too much density, which is sometimes seen in free designs shared by them. It’s important to note that increasing density provides better coverage up to a certain point. For more solid embroidery, you can consider lengthening the stitch, increasing the underlay, or using a color-block topping.
Types of different fabrics and the suitable density for them.
Lighter Fabrics
When working with delicate fabrics like chiffon, organza, and silk, it’s important to go easy on the stitches. These fabrics are lightweight and prone to puckering or distortion if the embroidery density is too high. To keep things light and airy, opt for a lower embroidery density. This means fewer stitches per inch, allowing the fabric to maintain its flowy nature while still showcasing your beautiful embroidery.
Medium-weight Fabrics
Fabrics like cotton, linen, and polyester blends are the go-to choices for many embroidery enthusiasts. They strike a nice balance between stability and flexibility, making them versatile options for various projects. When embroidering on medium-weight fabrics, a moderate embroidery density is the way to go. This means a good number of stitches per inch to ensure your design stands out without overwhelming the fabric.
Heavier Fabrics
If you’re into more substantial fabrics like denim, canvas, or upholstery materials, you have the opportunity to play with higher embroidery densities. These fabrics can handle a higher stitch count, allowing for more intricate and detailed designs. Feel free to increase the embroidery density to achieve bold and eye-catching embroidery that really pops on these sturdy fabrics.
Testing and Adjustments
No matter which fabric you’re working with, it’s always a good idea to test different embroidery densities on scrap fabric before diving into your actual project. This way, you can see how the stitches look and make any necessary adjustments. Keep in mind that factors like thread weight, needle size, and design complexity can also affect the embroidery density, so consider these elements as well.
Conclusion:
Embroidery densities are a key factor in achieving the desired results on different fabrics. By understanding the characteristics of your fabric and adjusting the embroidery density accordingly, you can create stunning embroidered pieces that showcase your creativity and attention to detail.

Funny Face Flip Book
Mauris congue venenatis nisl ut varius. In posuere sem lorem, eu iaculis ante. Quisque eget turpis sem. Phasellus
Flying Butterfly Surprise Card
Mauris congue venenatis nisl ut varius. In posuere sem lorem, eu iaculis ante. Quisque eget turpis sem. Phasellus
Exclusive Content
Be Part of Our Exclusive Community
Sed finibus, sem elementum tincidunt tempor, ipsum nisi ullamcorper magna, vel dignissim eros sapien at sem. Aliquam interdum, ante eget sagittis fermentum, mauris metus luctus sem, at molestie.


Leave A Comment