
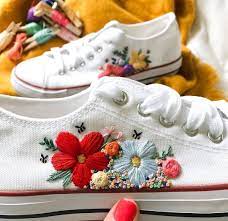
The other day, when I was talking about embroidery and unconventional things, we got to know about this beautiful trend that came in recent years. Check it out here.
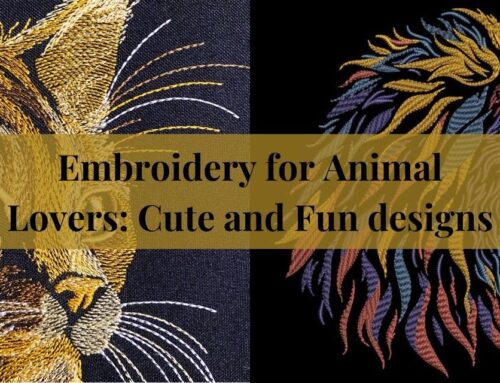
Embroidered canvas shoes! An impressive way to add a creative touch to your footwear. With a few materials and simple yet creative designs, you can transform a plain old pair of canvas shoes into a stylish accessory that can leave everyone around you in awe and wonder.
I have an easy step-by-step guide, that can make a process of embroidering your own canvas shoes very easy.
Required material:
- Canvas shoes (clean)
- Embroidery floss or thread in various colours that you want to use
- Hand embroidery needle
- Fabric chalk or pencil (not permanent)
- Stabilizer
Step 1: Gather your stuff
Before you begin, make sure you have all the necessary materials at hand. This is the key for continuing with any embroidery project that you don’t want lay around and take space done halfly. You’ll of course need a pair of canvas shoes, but important point is to pick the good ones that last long and are easier to work on. Invest your creativity on quality shoe material. Same goes for embroidery floss in your desired colours, it should be durable which keeps your work intact for longer. Pick a embroidery needle, that is right size to work with the shoes. Having everything ready and in front of you will make a smooth and enjoyable embroidery process.
Step 2: Choose design:
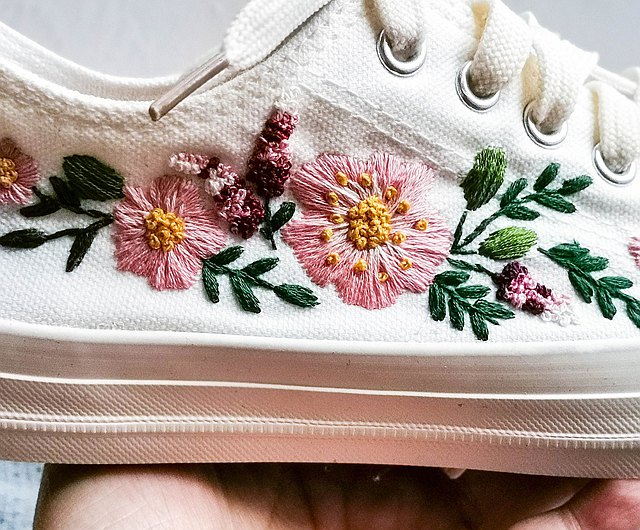
Confused already? It’s okay to take some time to decide on the design you want to embroidery onto your canvas shoes. It can be a simple floral pattern, a cosmos design, or any logo or sign you want to display or be a fan of. You can find inspiration online. Also, you can let your imagination run wild to create a design that reflects your personal style. For girls, floral patterns are the most loved. Little daisies, charming roses, and leaves. Geometric or spacey designs, including the sun, moon, and stars, are also included in the things that are loved. Simple little hearts or clouds above the grass also look cute on shoes. Go for something that’s easy, fun and creative for you to do.
Step 3: Prepare shoes
Before you start embroidering, make sure to clean your shoes and ensure they’re free of any dirt. My suggestion is that you get a new pair, but the old one would works fine too, as long as it’s clean. This will help the embroidery embrace properly and give you a clean canvas to work with. I’d also like for you to remove any laces or extra padding/sole of the shoe, so that they do not come in the way of your work.
Step 4: Mark the design (lightly with temporary pen chalk)
Use a fabric chalk or pencil, lightly trace your design onto the shoes. This will be your guide for embroidery stitches, it will help you stay on track and achieve the clean look. Make sure to use temporary one because you don’t need anything permanent on your shoes other then your embroidery.
Step 5: Secure the stabilizer
To prevent any puckering or stretching, place a stabilizer on the inside of the shoe where you’ll be embroidering. This will support the shoe fabric and keep it taut and stable for your stitches. But using a stabilizer in this project is an optional thing. It’s definitely better but not necessary here.
Step 6: Stitch embroidery design
put thread through your embroidery needle with floss and begin stitching along the traced design. Some of the embroidery stitch that you can use are: backstitch, satin stitch, or french knots. They are easy and create stunning patterns.
You can start by stitching out some simple lines as by using a straight stitch. To give the shoes a graphic sense, you basically want to build various shapes and patterns around them. A french knot for floral designs is a really suitable stitch. As you know, all it needs to be done is wind the thread around the needle and return it to the spot where the initial hole was. If you are not familiar with any of the stitches, then check out my beginners guide for types of hand embroidery stitches.
Take your time and each stitch should be secured before you move on to the next.
Step 7: Keep going on:
Keep going on. This step is very important as you might feel like changing your mind and find it hard. Work your way through the design, add colours, patterns, and different texture. Play with different stitches and techniques it make it more interesting.
Simply keep going around the shoes. You have complete control over how specific or general they are. Don’t be afraid to get it ruined, even if it doesn’t go as your plan, there are always more tries to make.
Step 8: Final touching:
Once you are done and it looks complete. Place your shoes back, inspect both of them, and fill in any missing spots. There is always some retouching or redoing to do. Ensure that your design is the same on both shoes.
Step 9: Leave it to set
This one sounds important and obvious, right? But you might get anxious to wear them once they become a whole picture of embroidered canvas and skip this step. So don’t hurry but of course you can try it out once just don’t go out. Allow your embroidered canvas shoes to set completely before wearing them. That way stitches will stay in place. If you have used water soluble stabilizer then wash it off and let everything dry.
Step 10: Show it off:
Now that your DIY embroidered canvas shoes are ready, it’s time to show them off to the world and grab everyone’s attention. Trust me in that one, people can’t help but take notice of such creations. Wear them with pride and let it shine through. Be prepared for compliments and questions about where you got your fabulous footwear. Who knows you might get a request or two to make it for others.
Conclusion:
Embroidering canvas shoes is a fun and creative way to express your personality and make your wardrobe luxury with the hand work. I personally love the outcome of it so much. It changes your whole look and give you anew personality!
With a little time, patience, and creativity, you can transform a plain pair of canvas shoes into a wearable work of art. So, grab your materials and get started on your own DIY embroidered canvas shoes project. Impress them all.
Share your experience, progress and final result with me and your friends through snaps or reviews. I’d love to see or hear about your exciting designs and creations.
Edible Easter Slime
Mauris congue venenatis nisl ut varius. In posuere sem lorem, eu iaculis ante. Quisque eget turpis
Creative Back To School Ideas
Mauris congue venenatis nisl ut varius. In posuere sem lorem, eu iaculis ante. Quisque eget turpis
Exclusive Content
Be Part of Our Exclusive Community
Sed finibus, sem elementum tincidunt tempor, ipsum nisi ullamcorper magna, vel dignissim eros sapien at sem. Aliquam interdum, ante eget sagittis fermentum, mauris metus luctus sem, at molestie.

Leave A Comment